You think you know how to put on your makeup—but you could be doing it so much better…and faster. These 59 bits of wisdom from the top pros will take your skills to a whole new level.
A great makeup trick is a precious commodity. It may not have the value of enriched uranium, but it will make you look a whole lot better. Imagine how much less laughable your prom pictures would be, for example, if someone had explained how to properly apply bronzer. Or how clever you’d feel if you could camouflage a big, red zit.
We found the tricks that truly make a difference. They don’t mandate that your eye shadow match your irises, or your dress, or your nail polish. Nor do they say that your brows must form a 42-degree arch. Instead, we asked the leading makeup artists what they really do at fashion shows and photo shoots to solve pesky problems. In keeping with the first rule of commodities trading, these tips truly perform.
EYE-OPENERS
CONNECT THE DOTS. To create a smooth line along the upper lashes, start at the outer corner and draw a series of dashes with an eye pencil, as close to the lashes as possible. Then connect the marks. “This is the best trick I ever learned,” says makeup artist Laura Mercier.
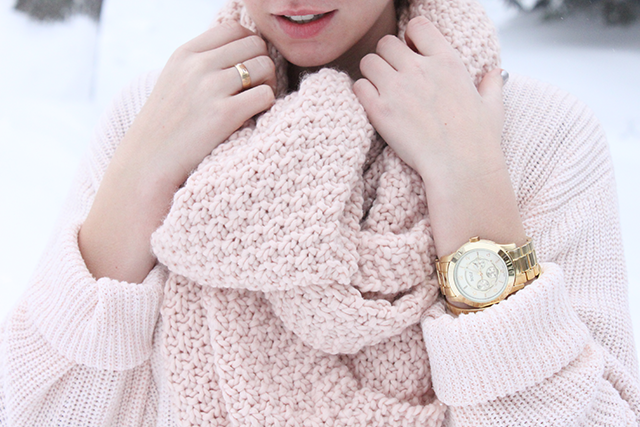
GO GENTLE. “Use the ring finger—the weakest—to pat concealer in place,” says Mercier. “That way, you won’t tug or pull the skin unnecessarily.”
WARM UP. Before dabbing concealer on your skin, warm it in the palm of your hand—the heat will thin the texture so the coverage is smooth.
DOT IT ON. When covering undereye circles, place three dots of concealer from the inner corner to the middle of your eye, then pat—don’t rub—them with the ring finger to blend.
GET WET. Deepen the color of any powder eye shadow by dipping a small, firm brush in water before swiping it over the shade. “It gives an intensity to the color,” says makeup artist Jeanine Lobell. It also helps the shadow last. Just don’t try to blend two shades—you’ll make a mess.
FIND THE DARK SIDE. For easy smoky eyes, rub a chubby kohl pencil on the back of your hand to warm it up, then dot it along the upper and lower lashes (don’t worry about making a straight line). Dip a cotton swab in eye cream and use it to smudge the lines.
CREATE DISTANCE. To make close-set eyes look farther apart, apply eyeliner only at the outer corners, then flick the line a millimeter or two beyond.
OPEN WIDE. Brighten eyes with a dot of pale gold cream shadow at the inner corners. “It makes the eyes look wide open and beautiful in the light,” says makeup artist Tom Pecheux.
DE-CREASE. “If the lids are oily, eye shadow won’t stick,” says makeup artist Charlotte Tilbury. Before applying any color, prep the lids with foundation, then press a velvet puff with translucent powder on top. (And consider the shade you use: Pale matte ones are the least likely to crease or to accentuate lines.)
DOUBLE UP. To prevent eyeliner from doing a disappearing act, trace over it with a short, stiff eye-shadow brush dipped in powder in a similar shade.
TAKE IT OFF. No matter what makeup you use, always choose a remover designed to take off waterproof formulas, says makeup artist Charlie Green. “The best ones look separated, like salad dressing. The oil takes off makeup, and the water gets rid of some of the greasiness.” As with vinaigrette, mix well.
DON’T RUB. To avoid tugging gentle eye skin, hold an oil-based makeup remover pad over the eye for at least five seconds to dissolve makeup, then gently sweep it all off.
LASH RITES
ON A ROLL. For the most natural-looking bend, squeeze an eyelash curler at the lash roots and then “pump the curler as you move outward toward the ends,” says makeup artist Dick Page. It gently and gradually curls the lashes.
LOCK THE CURL. If you have especially straight lashes, curl them and immediately brush on waterproof mascara, advises Tilbury: “It holds lashes up much better than a regular formula.”
DOUBLE DOWN. Make lashes more lush by using two different mascaras. Apply a fat-brush volumizing formula first, then a lengthening formula on top.
GO BEYOND THE PALE. Black mascara can look jarring on blondes. Instead, makeup artist Pati Dubroff suggests a brown mascara topped with a gold one.
FATTEN UP. When coating lashes with mascara, wedge the wand right against the roots and wiggle it before drawing it out. This makes the base of the lashes appear fuller and thicker.
BE A NEAT FREAK. Sweep a clean spooley brush through clumped lashes while the mascara is still wet to remove clumps without causing flakes.
WING OUT. To elongate lashes, work from the outer to the inner corners of the eyes. “You’ll deposit more on the outer corners that way,” says Dubroff. “By the time you get to the inner corners, you’ll have just the right amount of mascara left.” To increase the effect, apply another coat at the outer corners only.
COAX THE CURL. To lock the curl into your lashes, curl them after you’ve applied mascara—but let the mascara dry first so the lashes don’t stick to the curler.
FACE FACTS
GET IN THERE. If concealer collects into any lines, dip a cotton swab in eye cream and run it over the area.
TINT YOUR OWN. Mix liquid concealer with moisturizer at a ratio of about one to three, says Tilbury. “I use that around the eyes, the nose—anywhere. It blends easily and makes the skin look perfect.”
CAP YOUR FOUNDATION. If you run out of concealer, use whatever makeup has collected in the cap of your foundation bottle—it’s somewhat thicker and perfect for covering up flaws.
SPOT REMOVER. To minimize a blemish, douse a cotton swab with Visine, put it in the freezer for a half-hour, then hold it lightly over the spot for a minute. Once the area dries, use a tiny, stiff brush (smaller than the blemish itself) to dab on pasty concealer, moving in a circular motion to blend the edges. Wait for it to dry, then add a second layer of concealer and pat with loose powder.
COVER YOURSELF. Disguise a concave scar with concealer that’s a shade lighter than your skin. Use a pointed synthetic brush to fill in the center of the scar without going beyond the edges. If the scar is raised, choose a concealer that matches your skin exactly and pat it on with your finger. Keep concealer in place by allowing it to dry, then dust loose powder over the area.
COMBINE SHADES. To even out African-American skin, which tends to be (darker on the forehead, use a lighter shade of foundation on more deeply pigmented areas. Then blend well at the temples and the bridge of the nose.
DON’T CRACK UP. Prevent foundation from settling into fine lines by applying both a moisturizer and a foundation primer.
GO OUT ON A WEDGE. Apply foundation with a latex wedge sponge (dry for full coverage; damp for a sheer look) to avoid streaking. Swirl it on in a circular motion, and finish with downward strokes to flatten any tiny hairs on the cheeks.
LET IT GLOW. To give the skin a subtle sheen, mix a pea-size drop of highlighter with foundation in your palm before applying. To make foundation a little darker (in the spring or summer), try this trick with a drop of liquid bronzer instead of highlighter.
PRESS ON. To make sure that powder doesn’t settle into lines, press—don’t wipe—it on the face with a velvet puff, and dust off excess with a fluffy brush.
LAY OFF THE POWDER. Never use powder if the skin has so much as a slight tan—even translucent powder can make the complexion look gray.
WIPE IT OFF. To remove a makeup smudge without starting over completely,(dip a cotton swab into moisturizer and wipe it over the spot. Then blend in any remaining cream.
BLUSH WELL
GO IT ALONE. After foundation, apply blush before any other makeup, says Page. “Often, you’ll be surprised by how much it can brighten your face, and you won’t need anything else.”
GIVE A SQUEEZE. To find the most natural-looking blush color for you, pinch one of your cheeks when you have no makeup on, and apply blush to the other side. If your cheeks match, it’s the right shade.
HAVE A BALL. If your blush looks too bright or too dark, lighten it by swiping your cheeks with a clean cotton ball—it won’t leave lint the way a tissue can, or streak the way remover can.
GO FOR THE BRONZE. The most believable-looking bronzer is never more than two shades darker than skin’s natural color. If you have fair or ruddy skin, choose a rosy-tinted bronzer; on olive complexions, try golden shades; on dark skin, look for bright orange-copper tones.
JUST REDO IT. If powder bronzer looks dirty, muddy, or simply too dark, diffuse the color by going over the skin with a clean, fluffy brush. If you make the same mistake with cream bronzer, rub a few drops of moisturizer over the area.
GLOW FOR IT. To fake sun-kissed skin, apply bronzer, then follow with a rosy blush on the apples of the cheeks. “The cheeks naturally get a pink flush when the skin is tan,” says Page.
MAKE A MATCH. The right shade of liquid highlighter leaves only a glow on the skin—as opposed to depositing color. Usually, this means silvery pink for fair skin, golden tints for olive skin, and bronze highlighter for dark skin.
HELP HIGHLIGHTER. For a subtle glow, smile and dab liquid highlighter just above the apples of the cheeks, says Page. Then blend it up and out toward the temples in the shape of a Nike swoosh.
MIGHTY MOUTH
MAKE IT LAST. Prevent lipstick from seeping into cracks by coating the mouth with lip balm, letting it sit for five full minutes, then blotting the excess with a tissue before applying color. (For really chapped lips, gently slough off dead skin with a soft toothbrush or a damp washcloth before wiping off the balm.)
MASTER STAIN. Turn a traditional lipstick into a lip stain by applying three coats of a deep shade, leaving it on for a few minutes, and blotting it with a tissue so only the pigment remains.
FIND YOUR MATCH. To find the perfect natural-looking lipstick shade, “think of the color of your mouth after a good snog,” says Page. “It’s usually a rosy shade that’s not too brown.” Test different colors by covering half your mouth with lipstick and leaving the other half bare. Once you find a shade that’s slightly darker and glossier than the naked side, you have a winner.
KNOW YOUR LINES. To keep lipstick from bleeding, dip a cotton swab in translucent powder and roll it just outside the lip line before putting on any color. Stop there, though. “Some women put powder over their lipstick, thinking it will set the color,” says makeup artist Sue Devitt. “But it actually muddies the shade and is dehydrating.”
APPEAL TO THE BASE. To add richness and longevity to lipstick, cover the entire mouth with liner that’s the same shade as the mouth, not the lipstick. And use the side of the lip liner, not the point, to fill in lips completely.
SHINE ON. To make lip gloss last longer than 30 seconds, makeup artist Christian McCulloch says to blot the mouth with a tissue or a dry cotton swab first: “The wetter the mouth, the less likely the gloss will stick.”
LET IT GO. To take off long-lasting lipstick, cover the mouth with Vaseline and wait a minute before wiping it off. Waterproof eye-makeup remover works quickly, too, says Green.
HIGH-BROWED
EASE THE PAIN. Taking ibuprofen 90 minutes before plucking or waxing will obviously relieve the pain, but it will also reduce redness and swelling. And tweezing after a hot shower allows the hairs to slip out more easily.
PICK UP STRAYS. Tweeze brows in natural sunlight—it illuminates all the teeny strands a bathroom bulb will miss. And never tweeze them in a magnifying mirror—it’s too easy to overdo it.
FLIP-FLOP. Taper both brows uniformly by moving from the left brow to the right one after tweezing every few hairs, recommends brow expert Valerie Sarnelle of the Valerie Beverly Hills salon. Be sure to stand back a few feet from the mirror every once in a while to get perspective.
STAY THE COURSE. Don’t overpluck the area between your brows. To get it right, align the brow’s starting point with the inner corner of the eye.
SEEK AND DESTROY. After tweezing, spritz brows with water to locate baby hairs that might have been overlooked, advises brow expert Robin Narvaez of Salon Eliút Rivera in New York City.
DROP THE POINT. The most natural-looking way to fill in the brows is with cream shadow that’s the same shade as the hair. “This product glistens like hairs do, and gives the brows a healthy sheen,” says Page.